Hand watering works until the first hot week, a busy weekend, or a vacation. Then leaves wilt, tomatoes crack, and you spend your evenings dragging a hose around the yard. A drip system fixes that by delivering water slowly to the base of each plant, where roots can actually use it. The easiest way to build one is with one of the many drip irrigation kits sold for home gardens.
A good kit arrives with the tubing, connectors, emitters, and a filter or pressure regulator you need, so you can set it up in an afternoon without designing a system from scratch. The hard part is choosing. Some kits suit raised beds, others suit pots, and some are built for larger landscapes. This guide compares five of the best drip irrigation kits for 2026 based on what they include, how they are designed, and what owners and reviewers report. It also explains how to choose, install, and maintain a system.
If you are building new beds this season, start with our guide to the best raised garden bed kits, then come back here to plan your watering.
Quick Picks: Best Drip Irrigation Kits at a Glance
| Category | Pick | Best For |
|---|---|---|
| Best overall | Rain Bird LNDDRIPKIT | Mixed beds and plant-by-plant control |
| Best for large gardens | Dig GE200 | Big beds, up to 700 sq ft |
| Best for raised beds | Vego Garden Irrigation Kit | Vego raised bed owners |
| Best budget | Raindrip R560DP | First-time installers on a small budget |
| Best for containers | Orbit Micro Watering Kit | Pots, patios, and balconies |
Why Use Drip Irrigation Kits Instead of a Sprinkler or Hose?
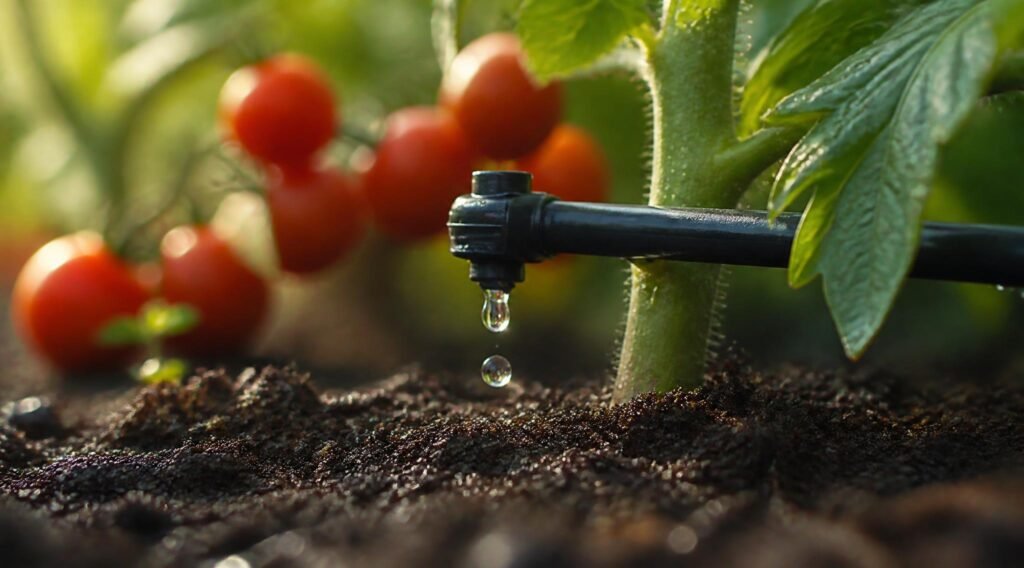
Overhead sprinklers throw water into the air, onto leaves, and onto paths. Drip systems put water at the soil line. That brings several real benefits.
- Less water waste. Less evaporation and runoff means more of the water reaches roots. Savings of 30 to 50 percent compared with overhead watering are often cited, though results depend on your climate and soil.
- Healthier plants. Dry foliage helps reduce leaf diseases such as blight and powdery mildew, which thrive on wet leaves.
- Fewer weeds. Water goes to your plants, not the bare soil between them.
- Consistent moisture. Steady watering reduces problems like blossom end rot and split fruit that come from wet and dry swings.
- Saved time. Add a timer and the whole system runs without you.
The trade-off is a small upfront cost and some setup. For most gardeners, drip irrigation kits pay for themselves in saved time and water within a season or two.
The 5 Best Drip Irrigation Kits for 2026
1. Rain Bird LNDDRIPKIT: Best Overall
The Rain Bird LNDDRIPKIT is a name that appears again and again at the top of 2026 roundups, and it is easy to see why. Rain Bird is the brand many irrigation professionals specify, and this hose-end kit brings that reliability to home gardens. It ships with about 108 pieces and is designed to serve up to roughly 26 individual plants, which makes it a flexible choice for beds with a mix of shrubs, perennials, and vegetables.
The kit uses pressure-compensating emitters, which means each emitter delivers a consistent flow even when water pressure varies along the line. That matters more than most beginners expect. Without it, plants at the start of a line get more water than plants at the far end. One roundup notes that the distribution hose is stiff, so lay it out in the sun for a while before you install it to make it easier to handle.
Pros
- Large selection of parts, around 108 pieces, for custom layouts
- Pressure-compensating emitters for even watering
- Trusted brand with replacement parts widely available
- Works for beds, borders, and raised beds
Cons
- Stiff tubing is hard to work with when cold
- Plant-by-plant layout takes more planning than a simple soaker
- Timer is usually sold separately
Best for: Gardeners who want a reliable, expandable system and do not mind a little planning.
2. Dig GE200: Best for Large Gardens
If your garden is big, the Dig GE200 is built for scale. It is listed with coverage of about 700 square feet and can be expanded to roughly 1,000 square feet, with around 124 pieces in the box. That makes it one of the most generous drip irrigation kits for mixed garden beds and larger vegetable plots.
Dig focuses on irrigation products and is known for heavier-duty parts than many generic kits. The tubing is thicker-walled than most basic home kits, which helps it handle higher pressure and last longer in full sun, according to one roundup. Beginners also get help: the kit is described as including two setup guides plus online videos, which takes a lot of the guesswork out of a first install.
Pros
- Large coverage area, expandable for future beds
- Thicker-walled tubing for durability
- Beginner-friendly instructions and videos
- Good fit for rows and mixed beds
Cons
- More expensive than basic starter kits
- More parts means a longer first install
- Overkill for a single small bed
Best for: Larger vegetable gardens and gardeners who plan to expand.
3. Vego Garden Irrigation Kit: Best for Raised Beds
If you own Vego metal raised beds, this kit was designed for them. The Vego Garden Irrigation Kit integrates cleanly with the bed structure, with about 25 feet of PVC tubing and individual valves for localized control. Reviewers praise the snap-together assembly and the way the kit lets you control watering bed by bed. It can also be scaled up with a hose for larger gardens.
The main caveat is compatibility. Because the kit is built around Vego beds, one reviewer notes that retrofitting it into existing beds can be awkward. If you do not own Vego beds, a more universal kit such as the Rain Bird or Dig options above will serve you better. If you do, this pairs naturally with the Vego bed we recommend in our raised garden bed kits guide.
Pros
- Designed to integrate with Vego raised beds
- Individual valves allow different watering per bed
- Simple snap assembly
- Scales up with additional hose
Cons
- Retrofitting into other beds can be awkward
- Best value only if you already own Vego beds
- Smaller coverage than landscape-sized kits
Best for: Owners of Vego raised beds who want clean, localized control.
4. Raindrip R560DP: Best Budget Starter
Not every garden needs a big system. The Raindrip R560DP is one of the most affordable drip irrigation kits you can buy, with one roundup listing it at around $15. It is aimed at a small garden row and uses fixed-flow emitters at about 1 gallon per hour.
That fixed flow keeps things simple. You connect it to a hose, lay the line along your row, and you are watering. It is a good way to try drip irrigation before you commit to a bigger system. The limits are scale and flexibility: a small kit covers a small area, and fixed emitters cannot be adjusted for thirsty and drought-tolerant plants in the same bed.
Pros
- Very low price
- Simple setup, good for first-timers
- Fits a single row or small bed
- Easy to replace or expand later
Cons
- Small coverage area
- Fixed emitter flow, no adjustment
- Fewer parts for custom layouts
Best for: Beginners with one small bed or row who want to try drip irrigation cheaply.
5. Orbit Micro Watering Kit: Best for Containers and Patios
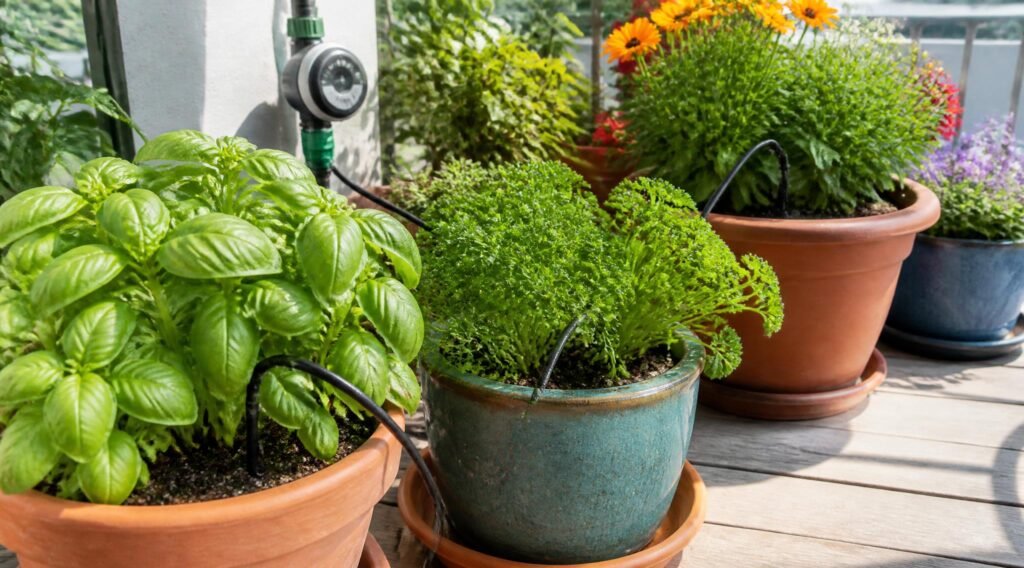
Container gardens have different needs from ground beds. Pots hold less soil, so they dry out faster, and a single drip emitter often waters only one spot. That is why bubblers and micro-sprayers work better in pots. A bubbler delivers water in a small circle at the soil surface, which wets the pot more evenly than a point-source emitter.
The Orbit micro watering kit is a frequent recommendation for patios, balconies, and container herbs. It is designed for pots and hanging baskets, and pairing it with a timer means your containers stay watered when you are away. Check the exact model number on the listing when you buy, since Orbit sells several container and hanging-basket kits with different part counts.
Pros
- Built for pots, baskets, and patio gardens
- Bubblers wet container soil evenly
- Easy to expand one pot at a time
- Low cost
Cons
- Not meant for in-ground vegetable beds
- Micro bubblers can use more water than drip emitters
- Small tubing needs occasional cleaning
Best for: Patio, balcony, and container gardeners.
Side-by-Side Comparison
| Kit | Best Use | Coverage | Flow Type | Skill Level |
|---|---|---|---|---|
| Rain Bird LNDDRIPKIT | Mixed beds | About 26 plants | Pressure-compensating | Beginner to intermediate |
| Dig GE200 | Large gardens | About 700 sq ft, expandable | Adjustable | Beginner with guides |
| Vego Garden Irrigation Kit | Raised beds | Per bed | Valve-controlled | Beginner |
| Raindrip R560DP | Small row or bed | Small | Fixed, about 1 GPH | Beginner |
| Orbit Micro Watering Kit | Containers | Pots and baskets | Bubblers | Beginner |
Coverage figures come from retailer listings and published roundups. Always confirm on the product page before you buy.
How to Choose the Right Drip Irrigation Kit
With so many drip irrigation kits on the market, a few questions will narrow the field fast.
1. Match the Kit to Your Garden Type
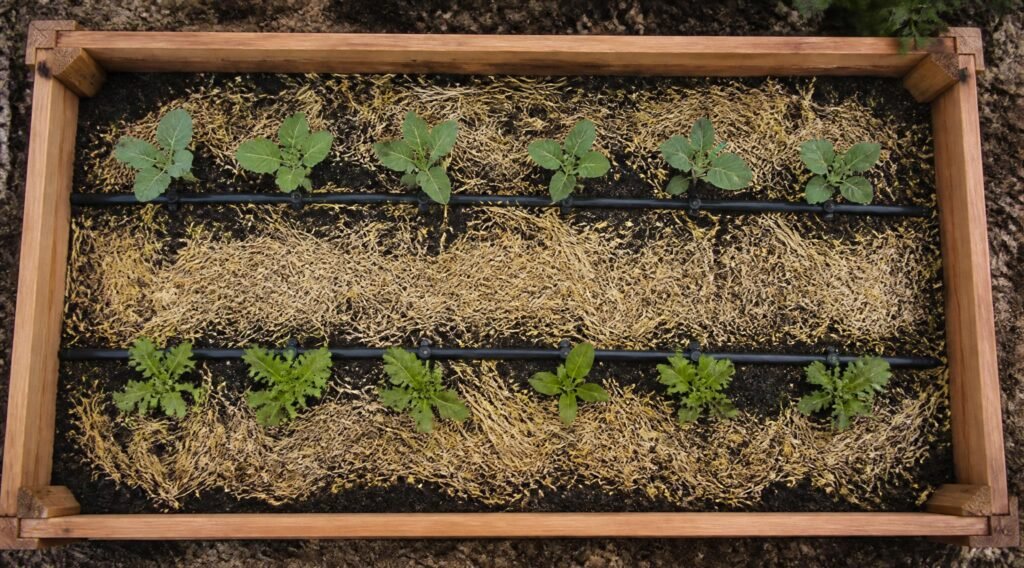
- Raised beds and vegetable rows: Look for emitter tubing or 1/4-inch distribution lines that let you place water exactly at plant roots.
- Mixed landscape beds: Choose a kit with many parts and adjustable or pressure-compensating emitters.
- Containers and baskets: Pick micro bubblers or micro-sprayers rather than point-source drip emitters.
2. Measure Your Space First
Sketch your garden and measure the length of each bed and the distance from the hose or spigot. Count plants or rows. Most kits list coverage in square feet or number of plants. Buy a kit slightly larger than you need, or one that is expandable, so you do not run out of tubing halfway through.
3. Look for Pressure Regulation and a Filter
Drip systems run at low pressure, around 25 psi, while household water is often much higher. A pressure regulator protects your tubing and fittings. A filter keeps grit out of small emitters. Good kits include both, or sell them as part of the setup.
4. Choose the Right Emitters
Emitters are rated in gallons per hour (GPH). Common sizes are 0.5, 1, and 2 GPH. Pressure-compensating emitters give even flow across long runs. Adjustable emitters let you give more water to thirsty plants such as tomatoes and less to herbs. Fixed emitters are simpler but less flexible.
5. Think About a Timer
A timer is what makes drip irrigation truly hands-off. Some kits include one. Others need a separate battery-powered hose-end timer. If you want to water on a schedule or while you travel, include a timer in your budget. Smart timers with phone control exist, but a basic one is enough for most gardens.
6. Check the Tubing Quality
Look for UV-resistant tubing that will not become brittle in full sun. Thicker walls generally last longer and handle pressure better. Quick-connect or push-fit fittings are easier for beginners than threaded ones.
7. Consider Water Quality and Climate
Hard water can clog emitters over time. If your water is hard or has sediment, choose a kit with a good filter and plan to clean it each season. In freezing climates, make sure you can drain or disconnect the system for winter.
How to Install Your Drip Irrigation Kit
- Plan the layout. Map out beds and rows, and decide where the main line will run from the spigot.
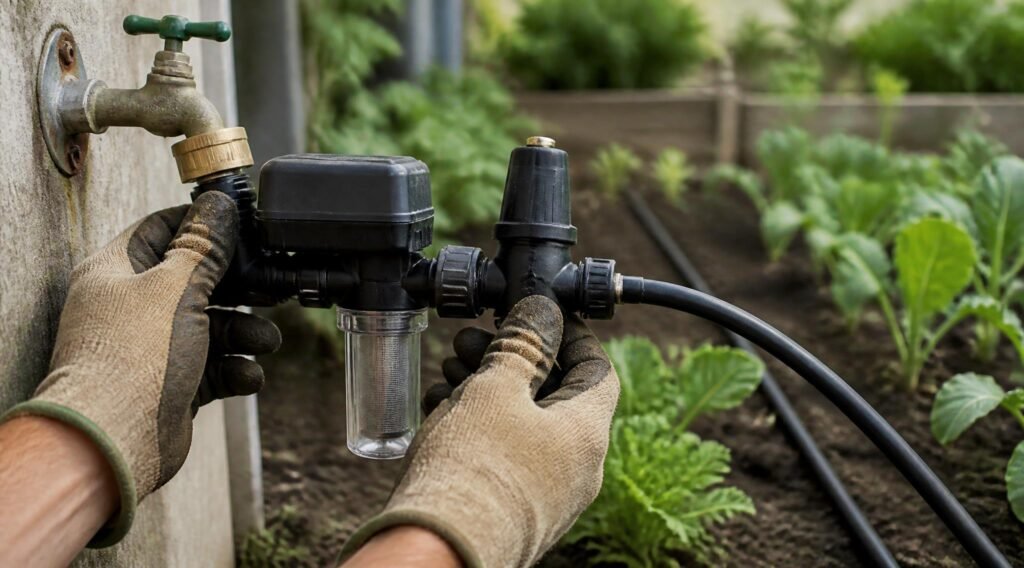
- Connect the head assembly. Attach the timer if you have one, then the filter, then the pressure regulator, then the adapter to the 1/2-inch main line.
- Run the main line. Lay the 1/2-inch tubing along the garden. In cold weather, warm it in the sun first so it uncoils easily.
- Add distribution tubing. Connect 1/4-inch lines to the main line and run them to each plant or along each row.
- Place the emitters. Put one at the base of each plant, or space emitter tubing about 12 inches apart for rows.
- Flush and cap the ends. Run water through the system for a minute to clear debris, then close the ends with end caps.
- Test and adjust. Turn on the water and walk the system looking for leaks, clogged emitters, and dry spots.
- Cover with mulch. A layer of mulch over the tubing protects it from sun and holds moisture. See our guide to the best mulch for vegetable gardens.
A simple example: a 4×8 raised bed with 16 to 24 emitters at 1 GPH uses about 16 to 24 gallons per hour. A 30-minute cycle then delivers roughly 8 to 12 gallons. Adjust the time to your soil, plants, and weather.
How Often and How Long Should You Water?
Most vegetable gardens need about an inch of water per week, from rain and irrigation combined. Drip systems deliver water slowly, so they usually run longer but less often than sprinklers. A common approach is to water deeply two to three times a week in warm weather. Sandy soil needs shorter, more frequent cycles. Clay needs longer gaps so water can soak in.
Check the soil with your finger. If the top two inches are dry a day after watering, increase the time. If the soil is soggy, cut back. A soil moisture meter can also help you dial in your schedule.
Maintenance and Winterizing Tips
- Check for leaks monthly. Walk the lines in the growing season and fix loose fittings.
- Clean the filter. Rinse the screen every few weeks, and more often with hard or sediment-heavy water.
- Flush the lines each spring. Open the end caps and let water run to clear debris.
- Replace clogged emitters. Soak them in vinegar or swap them out.
- Protect from rodents and sun. Mulch over tubing helps on both counts.
- Winterize in cold climates. Drain the lines, remove the timer and filter and store them indoors, and open the end caps. This prevents freeze damage.
What Plants Benefit Most from Drip Irrigation?
Drip irrigation works for almost everything, but a few crops respond especially well.
- Tomatoes and peppers: Steady moisture reduces cracking and blossom end rot. See our how to grow peppers guide.
- Squash, cucumbers, and melons: Dry leaves mean less mildew.
- Carrots and beets: Even moisture prevents splitting.
- Herbs and flowers: Easy to water in pots and borders.
If you grow mixed plantings, group plants with similar water needs on the same zone or line. Our companion planting guide and crop rotation guide will help you plan beds that are easy to water.
Frequently Asked Questions
What is the best drip irrigation kit for a vegetable garden?
For most vegetable gardens, a kit with adjustable or pressure-compensating emitters and 1/4-inch distribution tubing works best. The Rain Bird LNDDRIPKIT is a strong all-around choice, and the Dig GE200 suits larger plots.
Do drip irrigation kits really save water?
Yes. Because water goes directly to the soil at the plant base, less is lost to evaporation, wind, and runoff. Savings of 30 to 50 percent compared with overhead sprinklers are often reported, though your results will vary.
Do I need a pressure regulator for drip irrigation?
In most cases, yes. Household water pressure is typically far higher than drip tubing can handle. A regulator protects fittings and keeps flow even. Many kits include one.
How many emitters do I need per plant?
One emitter per plant is common for small vegetables, while large plants like tomatoes may benefit from two. For rows, emitter tubing with built-in emitters every 12 inches covers the whole line.
Can I use drip irrigation in raised beds?
Absolutely. Raised beds are one of the best places for drip irrigation because the soil drains quickly and dries out faster than ground soil. Run two or three lines along the bed or use a grid of emitter tubing.
How long should I run my drip system?
It depends on your soil, plants, and weather. A common starting point is 30 to 60 minutes, two to three times per week in warm weather. Check soil moisture and adjust.
How do I stop emitters from clogging?
Use a filter, flush the lines each spring, clean the screen regularly, and replace clogged emitters. Hard water may need extra attention.
Can I leave my drip system out in winter?
Not in freezing climates. Drain the lines, remove the timer and filter, and open the end caps to prevent freeze damage. In mild climates, you can leave the tubing in place.
Final Verdict: Which Drip Irrigation Kit Should You Buy?
The right choice depends on your garden:
- Best overall: The Rain Bird LNDDRIPKIT for flexible, reliable watering in mixed beds.
- Best for large gardens: The Dig GE200 for big beds and room to expand.
- Best for raised beds: The Vego Garden Irrigation Kit if you already own Vego beds.
- Best budget: The Raindrip R560DP for a small row and a very low price.
- Best for containers: The Orbit Micro Watering Kit for pots, baskets, and patios.
Whichever of these drip irrigation kits you choose, the basics are the same: plan your layout, protect the system with a filter and regulator, add a timer, and mulch over the lines. A well-set system will save water, save time, and give your plants the steady moisture they need.
Ready to build your garden? Check our guide to the best garden sprayers for pest and feeding care, or revisit our raised garden bed kits guide to plan your next bed.